9.30.2010

Test Render

I add the new elements to my main scene, and I have an entire plane of my level that animates automatically-
I’m starting to think that I can make this turn out really cool.  I'm looking forward to seeing how dynamic I can make the camera moves.  

I have a couple of things that need to be done before animating-

-A flying enemy w/animation.
-Additional frames for Megaman to facilitate a jumping animation.

Since the animation will be taking place on this plane, I can work on it and the fore/background simultaneously.  I also want to-

-Expand the existing scene into the foreground and background.
-Create machinery elements (Hopefully animated) for the background.

However, before I move forward on anything, I want to edit some of the objects in the scene I am not happy with.

9.28.2010

Additional Elements

I don’t have much to say today, which is probably good, since my posts have been feeling kind of long-winded.  I just wanted to share a few new elements necessary to my scene-

Interesting side-note, while looking for visual research, I found out that the hardhat guy is actually named “Met”, short for “Metall”(yes, with 2 L's), and he has been in every Megaman game since the original.  However, I have always called him “Hardhat Guy” so I will continue to do so.  I’ll try to resist abbreviating that to “HG” as that means something else entirely in Japan.

And, though it won't play into the story, I want to add one of the blue energy tanks. I spent so many hours of my childhood finding them and figuring out how to collect them without dying that I have to include one in the scene-


9.25.2010

Building the Level

I’m starting to build the pieces out in a single plane (as they exist in the 2d game)-


Once everything is lined up according to the rough sketch in my last post, I will move and copy elements in Z space to get as much depth as I can.  The plan is to build the whole “level” he will be moving through, and then animate him moving through it.  Once that is done, I will go in and see where I can get the most dynamic camera angles on the action, and where I can cut in for close-ups. 

Again, I’m doing things backwards; normally storyboards would precede the animation.  I will be animating a “dry run”, then moving the camera around the animated scene to try to find the best angles.

I just figure, what the hell?  I’ve already started with animation before I had a story.  since I am trying to imitate the feel of an old game, I might as well get the animation right from the side view first, and hopefully the feel will carry through to the more dynamic angles.

Part of the point of taking on a personal project is challenging yourself.  The best way to learn more about your craft is taking risks and trying new things.  


9.21.2010

Story, or the lack thereof

I’m approaching this animation in a pretty backwards way.  Usually, one starts with a script, creates boards from the script, and then finds an animation style that supports the story, themes, and style of the piece.


Since this was just a test, I haven’t really thought about any sort of story.  Now that I think it will work, I want to expand it into a few seconds of animation, so I need some sort of story.

One of the (few) things I like about advertising work is that it is often based on short bursts of visual flair.  Ads usually have some sort of story, but they just as often have mindless flashy graphics to draw your attention to a product or an end card.

So what is the story of the game I’m trying to represent?  There’s some crap about an evil doctor that creates robot masters, but not only would that take too long to get across, it’s a pretty sucky story.  As with the vast majority of games in the 8-bit era, the story is just a thin excuse for wanton robot murder.

I don’t want to reinvent the game and try to inject some story that doesn’t belong, so I’m going to let it be what it is, a representation of a few seconds of 8-bit game play in 3 dimensions.  He’ll run and jump across platforms, and shoot a couple of enemies.  I’ll do the 8-bit adaptation of Macbeth later.

So my “script” for this piece will be a 5-minute sketch-


I'm just gonna let the little guy do what he does best, move left to right.

9.15.2010

Automating Animation


It is quickly becoming apparent that I will be dealing with thousands upon thousands of cubes, and keeping track of them as they animate is going to be quite the chore.

I’m a big fan of creative planning.  A few minutes of forethought about how you build something (whether 2d or 3d) can save hours of time and countless headaches down the line.  Anything can be built in a myriad of different ways, and being creative about your processes and using your software packages together in new ways is essential to creating original work.

There are a few elements that I know I want to have in my scene.  One of the things I remember about every Megaman game that I have played is the “conveyor belt” style platforms, that would put a forward or backward force on the player sprite.  They slide your sprite in one direction if you stand still, you run slower if you are going against the “flow” etc.

I start by creating the smallest section of the conveyor belt possible, as with the player sprite, I create a separate object for each frame-


If I add a Set Driven Key to the group of objects that controls the visibility using the process explained in my last post, I have one little animated chunk of the belt-

Note that I have planned the motion on a 3 frame cycle.
-There are 3 pixels before the track repeats (2 pixels of track and 1 pixel of gap)
-The track on the bottom moves the opposite direction than the track on the top so that the motion of the track will be circular
-The arrows in the center are designed so that they "flow" in the direction of the top of the track.

This allows the segment of track to be tiled horizontally.

I duplicate the chunk several times until I have the length of belt I want, and create ends using the same method.  Building the belt in this way allowed me to only animate a small part of it and propagate that animation over the whole belt, rather than having to move every single animated cube in the object.


I reorganize the groups, so that frame 1 of each segment is in one group, frame 2 is in the next, etc. I add an attribute called “BELT_FRAME” to the top group in the hierarchy, and have that drive the visibility of these new groups, and now have one attribute that animates all of the cubes in the belt.

Since this will be a constantly moving element in my scene, I set keyframes on BELT_FRAME then, in the graph editor, set the curve’s post-infinity to ‘cycle’.

Now I have an element that I can drop into any scene, it will automatically animate in an endless loop, and I only need to deal with 4 keyframes on 1 attribute if I want to alter the animation.  This definitely beats keeping track of keyframes on thousands of cubes!


9.12.2010

First Animation Test

After doing some thinking, I plan out the best way to handle the animation.  I will be building each frame of the sprite as a separate object in Maya, then animate it by turning one object “on” and the previous one “off”.

This is similar to what’s called “replacement” animation in stop-motion.  For instance, Stop Motion (i.e. Aardman) characters have between a handful and a hundred different mouths, each sculpted into a different shape-


These shapes are replaced frame by frame (hence the name “replacement” animation).  When the animation is played back at real time, the planned changes of each replaced mouth create the illusion that the mouth is morphing into the phonemes and expressions that the animator wants to convey.
In a normal CG character animation situation, these mouth shapes would be built as “blend shapes” where the animator would distort the base model of the face into the various shapes, record them, and let the computer interpolates the changes to make up the frames in between.

This results in a smooth morph between each shape.  Since I am attempting to emulate the feel of static pixels turning on and off, I am opting for the stop-motion method of animating instead of the usual CG methods.

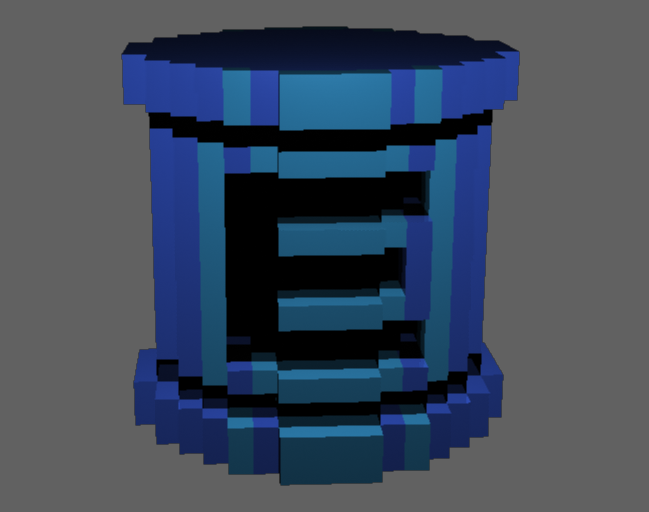
I duplicate the first sprite I created in 3D, and shift the cubes around to create a new object that serves as the next frame (replacement shape) in the animation.  Luckily, in researching the sprite online, I find it only has 3 frames of animation-


Within Maya, I create each frame as a separate object (group of cubes)-


 I then parent all of the frame objects to a curve and add an attribute to the curve called “frame”. 

I use Set Driven Keys to attach each frame (object) to a number in the “frame” attribute, the visibility of all objects is the driven attribute, so that if “frame” is set to 2, object 2 is the only visible object, If “frame” is set to 3, object 3 is the only object, etc.

This creates a run cycle that has the look of sprite animation.  Rather than morphing or rotating in 3 dimensions between the keyframes, one arrangement of cubes is replaced by another in sequence, emulating the look and feel of one frame of a sprite replacing another.

Now I have one control curve that I can use to move the animated sprite around in space, and an attribute on that curve that can be used to switch between frames of the 3D “sprite”.

The arrangement of cubes in every frame of the test isn’t perfect, but it’s a good enough proof of concept to move forward with planning a scene.

9.11.2010

Animation Goals

The idea that I’m trying to get across is pixels in 3D space.  A square pixel represented in 3D would, of course, be a cube.  However, I am trying to emulate actual sprite animation, not just pixilated geometry. 

There are a couple of people who have done similar things, most notably 3D Dot Game Heroes for the PS3-


Jump to about 1:08 in the trailer, and you will notice that, though the geometry is built out of cubes, when the geometry rotates, the cubes also rotate, meaning some cubes are at an angle to others.  While this is one way of emulating a look of pixelation, sprites are constructed on a grid and cannot deviate from that, you cannot rotate a pixel in relation to it’s neighbors.

The look that I am going for is to follow a strict grid, while objects can move horizontally and vertically within that grid, they cannot rotate, rotation must be achieved by turning pixels "on and off", drawing a whole new frame of the sprite.

In other words, I am trying to force myself to keep each “pixel” cube perpendicular to the camera at all times and achieve rotation by changing which cubes are where within a 3d grid, rather than rotating the existing cubes in 3D space.

Look at the sprites in my previous post, see how the bottom of his back foot is not flat, it “steps” as if it is aliased.  This is different (and much more difficult) to pull off than simply copying and rotating his front foot, and animating the foot from one position to the other is much more involved than just rotating the foot.

9.10.2010

The challenges of 2D vs. 3D

When the geometry is seen directly from the side, I want to keep it as true to the original pixels as possible.

The main concern I have upon starting is how much rotation I will be able to get out of a sprite that was drawn in 2D.  Obviously, if I were to shoot everything straight-on with an orthographic camera, there would be no point in doing it in 3D at all, it would look the same as the sprite art.

However, the sprites are drawn to give the illusion of depth and overlap, if you look at this image-


You notice that Megaman’s head is at a ¾ view, which looks great in 2d, but is not ideal in 3D.  Model sheets for 3D characters always contain orthographic views for modeling (straight-on from the front, side, etc).   Although I cauld have made this up and still had him look vaguely like Megaman, the ¾ view would not look like the original sprite, and that is not the look I’m going for.

My concern was that , since the opposite side of his head would have to be gimped to keep pixels perpendicular to the screen, I would not be able to rotate around the model enough to allow for the parallax of a perspective camera (since the perspective will be more extreme toward the edges of the screen)

Another Issue that I ran into with the initial sprite test is the fact that everything is outlined in black.  This is another thing that works in 2D, but not 3D.

However, when I started modeling, I found that I could actually use those black pixels to describe the form that has receded in space in the 2D art.  In fact, it was necessary to have these pixels in order to “round out” the form in z depth.

So, my initial sprite model comes out looking like this-

Though I am not able to rotate all the way around the 3D sprite (It looks like crap when you approach 90 degrees as I expected), I am able to get enough rotation out of the model to play up the fact that it is in 3D space-


Although I am already starting to deviate from the literal pixels of the original sprite, I feel as though the deviation is a necessary evil in converting the image from 2D to 3D, and the resulting model is close enough to the original sprite that I am comfortable enough to move on to an animation test.

Experiment- 3D Sprite Animation

I've always loved sprite animation.  It stems from my childhood, as my parents forbade me to play video games, and I would go to a friend's house to play some console that (I think) predated Intellivision and Calecovision.  There was a black and white game of cowboys attempting to shoot each other through a field of mushrooms, the cowboys themselves only consisted of a handful of pixels.

Fast forward a few years, after the explosion of the NES, I was still forced to experience games at friends' houses.  I would play, but I sucked since I was the only one that didn't have my own Nintendo, so my turn would last a fraction of the time my friends' would.  I spent much more time watching than playing, and was captivated by the animation, like the 5-pixel cowboys, the simplicity of the resolution of the sprites forced your imagination to fill in the blanks.  However, the color palette and 8-bit processor were able to suggest an entire illustrated world, rather than just a rough concept of action.

Sadly sprite art is dying due to the advancement of 3D in games.  There are still some artists around, I really love the work of Paul Roberts- http://probertson.livejournal.com/33796.html.

Anyway the point of this boring trip into my past is that I want to try an experiment, trying to create the feel of 2d sprite animation in 3D.  As a subject, I will be using actual 8-bit sprites from my favorite NES series, Megaman/Rockman.  This is so that my success or failure depends on my translation of the sprite into 3 dimensions, and not the design of the sprite itself.  I'm choosing an 8-bit sprite not only because of nostalgia, but also because it will be easier to deal with logistically.

It'll either be something new awesome, and original, or not work at all.  Wish me luck. . .

9.05.2010

Delusions that the internet is interested in me

It's late.  I'm drunk.  I signed up for a blog address.

I'll either be posting videos and art and stuff, or forget about this forever.

Either way, consider yourself lucky to be a part of what will instigate the end of days. . .